Flavor profile
Taste & aroma
Powerful, spicy, salty - organic sodium in the composition gives a feeling of "saltiness" without salt. Strong, instantly recognizable aroma.
organic sodium in the composition gives a feeling of "saltiness" without salt. Reminiscent of mature stem celery, but much more intense and without the woody bitterness that occurs in overripe mature stems
Strong, instantly recognizable - phthalides and monoterpenes, which are part of essential oils, form the same smell that is associated with broth, risotto and autumn cuisine. Opens in hot dishes from the heat - even a drop over a plate of soup gives the effect.
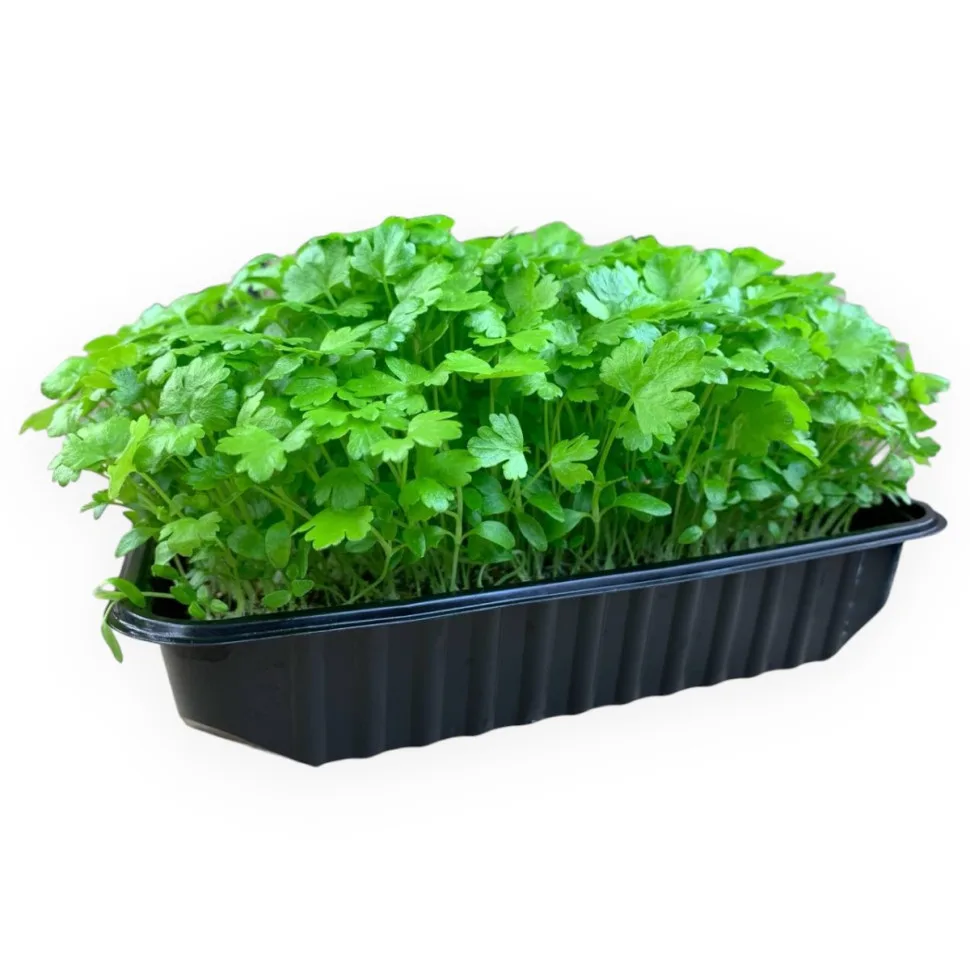
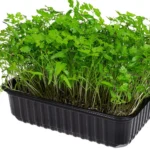
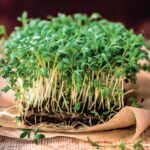
Lacy, carved leaves are small and delicate, without feeling on the teeth. Stems are thin, light
Ripening and optimal harvest time
The cotyledons are formed, the taste is softer and more grassy.
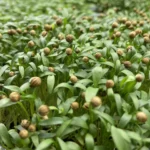
Real carved leaves appear, the aroma is at its peak, the most recognizable "celery" profile.
The aroma may become sharper and bitter, the leaves turn yellow at the edges.
Why flavor may vary batch to batch
Celery essential oils are synthesized more actively at a moderate temperature (+20...+23°C) and good lighting. Microgreens grown in a too warm or dark room smell weaker and taste more neutral. In winter, with insufficient artificial lighting, the difference between batches can be noticeable.
Culinary use
How to use
Celery is a great culinary accent. Add fresh at the end of cooking or directly on the plate.
Broth or cream soup
place a pinch directly on the plate before serving - the heat instantly releases the essential oils
"Bloody Mary"
several stalks instead of a big stalk — it looks thinner and tastes more intense
Poached eggs on toast
sprinkle on top with fleur de sel — it replaces both salt and spice at once
Potato salad
mix with boiled potatoes, mustard dressing and a pinch of microgreens - it will give depth of taste
Risotto in the finale
add after turning off the heat - the aroma will not have time to evaporate, but it will partially open from the heat of the dish
Tomato tartare
finely chopped tomatoes + olive oil + celery microgreens = a simple appetizer with a restaurant character
Perfect pairings
Direct use - the aroma of celery is revealed in hot dishes
Classic: cream cheese on toast + a drop of lemon + celery microgreens
An obligatory element of "Bloody Mary" is not just decor, but a taste component
- Do not add to dishes during long-term cooking - essential oils evaporate quickly when heated above 80°C
- Do not use as a salad base - the flavor is too concentrated for large volumes, use as a seasoning, not as a base green
- Do not combine with very sharp flavors (horseradish, hot pepper) - they drown out the delicate spicy profile of celery
- Do not season with sour sauces in advance - tender leaves stick together and lose their appearance
Home storage
How to store
Due to the high content of essential oils, celery microgreens last significantly longer than most tender greens.
Keep in the refrigerator at +2...+5°C. Cut exactly as much as you need. Fresh greens in the tray stay fresh for up to 14 days — essential oils act as natural preservatives.
Place in an open container or plate, cover with a damp paper towel. Don't seal — without air, greens yellow faster.
Don't wash until ready to eat. Wet greens spoil much faster. Rinse just before serving.
Pro tip: Store only in a closed container - essential oils are very volatile. Open greens lose most of their aroma in a few hours. A great option for selling live trays: the buyer cuts fresh greens every day.
Nutrients & health
Benefits & composition
Celery is valued for its rich vitamin-mineral composition and bioactive compounds typical of microgreens.
Like most microgreens, celery contains a concentrated amount of nutrients relative to its weight — many times more than the mature plant.
| Protein | 2.0 g — building material for cells |
|---|---|
| Calories | ~31 kcal |
| Vitamins | K, C, A |
| Minerals | Sodium, Potassium, Magnesium |
| Fiber | is present |
- Moderate consumption is recommended for pregnant women: apiol essential oils in large quantities can increase the tone of the uterus - do not exclude from meals completely, but avoid large portions
- For people with a tendency to form kidney stones: celery contains oxalates - as part of a balanced diet with sufficient fluid intake, this is not critical, but it is worth keeping in mind
- For people taking blood thinners: due to the vitamin K content in leafy greens, keep a stable amount of greens in your diet and consult your doctor
This information is general in nature and is not medical advice. Composition data: USDA FoodData Central.
Worth knowing
Organic sodium
one of the characteristic features of celery. Unlike table salt, sodium in the composition of the plant is associated with organic compounds. That is why celery microgreens are traditionally used as part of salt-free diets — they provide a salty taste without increasing the intake of table salt.
Vitamin K
is contained in leafy greens in significant quantities. It is a fat-soluble vitamin that is better absorbed in combination with fats - add olive oil or avocado to a dish along with microgreens.
Phthalides
essential oils that give celery its characteristic aroma are a subject of scientific interest. This substance is traditionally associated with a relaxing effect on the muscle tissue of blood vessels.
Vitamin C and beta-carotene
present in fresh form. Heat treatment destroys these vitamins - maximum benefit in raw consumption or when added to a ready meal.
Celery: how to grow — step-by-step guide
Growing parameters, agronomy, common mistakesGrowing parameters
Dusty, ethereal, very fine
Step-by-step guide
Seed preparation
Celery seeds are extremely small, almost dust-like. One mistake during sowing and the batch is irrevocably spoiled: it is impossible to wash or move the seeds after contact with moisture.
Before sowing, make sure:
- The seeds are fresh (old celery seeds lose their germination dramatically - do not sow batches that have been lying for more than 2 years)
- The substrate is even and well-moistened - without dry spots and puddles
- The atomizer is charged and set to a fine mist
Soaking is prohibited. The seeds are dusty and would stick together in an uneven mass. Sow only dry.
Sowing
The norm of 0.2–0.3 g is extremely small. For understanding: a whole tablespoon of such seeds weighs about 1–1.5 g.
- Moisten the substrate evenly - the top layer should be wet, but without drops on the surface
- Carefully spread the seeds from the bag or from the tip of a dry spoon, moving from the center to the edges
- The seeds should lie on the surface — do not deepen, do not sprinkle on top
- Spray abundantly with a fine mist from the atomizer - the seeds will press against the substrate and be fixed by moisture
Mix the seeds with a small amount of dry sand or fine vermiculite in a ratio of 1:5. So it is much easier to evenly distribute the dusty seeds over the entire surface of the tray.
The clamp is unusual, but necessary
It would seem that with a dusty seed it is impossible to press it - it will spread it. But it is not so.
A press weighing 1–2 kg for celery performs a different task than for radishes or peas: it does not press the seeds, but only ensures uniform contact of the substrate with the seeds over the entire surface. The clamp is placed through the lower empty platform tray (the seeds do not touch the lid).
Be sure to moisten the top layer before pressing and monitor the humidity every 2–3 days — in 7–9 days of blackout, the substrate may dry out under the weight.
Additionally, cover the tray with a film with several holes before pressing. The film will keep moisture inside even with a load on top — this is critical for such a long blackout stage.
Darkness (Blackout) — 7–9 days
This is the longest blackout among all standard cultures. And the most critical.
Temperature: +20...+23°C. At +18°C and below, the seeds almost do not germinate - they lie for days and weeks without any signs. At +25°C and above, the risk of rotting increases even before germination.
What is normal:
- On the 3rd-4th day - no signs. This is normal, not a cause for panic
- On the 5th-6th day, barely noticeable white dots (this is root fluff and the beginning of germination)
- On the 7th day - uneven pale sprouts of different heights, some of them have not yet come down
What is not normal:
- Black or brown spots on the surface of the substrate → excess moisture or heat + moisture. Ventilate
- On the 9th day, most of the seeds did not germinate → most likely, either the seeds are old or the temperature was too low
Watering during a blackout: Check the condition of the substrate every 2-3 days. Dusty seeds die from drying out instantly - even a few hours without moisture is enough to lose seedlings at the root hair stage. Moisten with a fine mist from the atomizer, avoiding the formation of droplets.
Vegetation in the light — 14–21 days
Expose to the light when most of the sprouts reach 1-2 cm. Take your time - it is better to keep small, uneven seedlings in the dark for another day than to expose early and get pale straight greens without a characteristic leaf shape.
Lighting:
- LED phytolamps: 16–18 hours a day, distance 20–30 cm
- A natural window sill: not enough for a full-fledged aroma - essential oils need active lighting
- With insufficient light, the stems are stretched, become thin and weak, the aroma is much weaker
Watering:
- The bottom through the pallet is the main method
- Top watering with a sprayer - only the first 3-4 days in the light, while the roots have not yet gone deep into the substrate
- Celery drinks moderately - do not overmoisturize: the root is thin and sensitive to stagnant water
Ventilation:
With a long cycle (up to 30 days), the risk of mold on the substrate is significantly higher than with fast cultures. Provide stable, moderate ventilation from the first day in the light. Do not place the tray in a stagnant corner of the rack.
Temperature: +20...+23°C during the entire cycle. This is a stable temperate zone - neither hot nor cold.
Watering
- Water it 1 time a day (in the morning)
- Bottom or shallow top watering - maintain even moisture
- Celery is slow-moving and needs constant humidity throughout the 14 days
- A sign of lack: tender sprouts stop growing, leaves curl slightly → water
Storage
| Uncut in tray | Fridge +4...+6°C | up to 3 weeks |
|---|---|---|
| Cut in container | Refrigerator | up to 7 days |
| Room temperature | 1–2 days |
Harvest
- Real carved leaves have appeared - they are the ones that give the recognizable "celery" look
- Height 5–8 cm
- When lightly touching the leaves, there is a pronounced spicy aroma
Do not cut at the cotyledon stage: they look like ordinary grass greens without a characteristic shape, and the buyer will not get the expected visual result.
Sharp knife or scissors. The greens are very light and tender - a dull tool will remove the stems.
Wash very carefully immediately before use or packaging. Delicate leaves from a strong jet stick together and lose their shape - use a shower or sieve with a fine jet.
Seasonal adjustments
- Mold: at +24°C and above, the risk of decay during blackout increases — shorten blackout to 6–7 days and ventilate daily
- Ventilation: at the stage of vegetation, blowing is mandatory - in dense small green mold on the substrate develops quickly
- Cycle: slightly reduced, but insignificantly - for such a slow culture, the difference is 1–2 days
- Watering: the substrate dries out faster - check the humidity daily, do not allow it to dry out
- Expect: thinner stem and slightly weaker aroma compared to the cool season
- Heat mat is mandatory: below +18°C, the seed slows down or stops sharply — the cycle can stretch to 35–40 days; thermostat under the tray for the entire blackout period
- Temperature at night: after coming out into the light, make sure that the temperature does not fall below +18°C — the drop stops growth
- Expect: lengthening the cycle by 5–7 days, but the aroma is richer and more persistent
Water pH and EC
The optimal range for celery: 6.0–7.0. At a pH higher than 7.5 (hard tap water), chlorosis — yellowing between the veins of the leaves — may appear on the 15th–20th day. This is a sign of blocking the assimilation of iron and manganese in an alkaline environment. Not related to the disease - solved by acidification of irrigation water.
Optimal range: 0.5–1.0 mS/cm. Celery is sensitive to mineralization with such a long cycle. Too mineralized water (EC above 1.5) with frequent watering leads to the accumulation of salts in the substrate and a bitter chemical taste in the finished greens. If your region has hard water, dilute it with filtered or distilled water.
Experienced grower tips
Do not sow without an order
Celery takes up space on the shelf for almost a month. If you don't have a confirmed buyer (a restaurant, a regular customer on a detox diet), this position simply won't pay off. Plan sowing for specific demand.
Sand or vermiculite when sowing
Mix 0.2 g of seeds with 1 g of dry fine sand - even distribution becomes many times easier. Without this trick, it is almost impossible to sow dusty seeds evenly.
The film under the clamp is the norm
Do not be afraid to use a film and a clamp at the same time: the film retains moisture, the load ensures contact of the substrate with the seeds. Together, they give smoother stairs without drying out on a long blackout.
Aroma is an indicator of readiness
Touch the leaf and smell it. If a clear smell of celery is felt, the greens are ready. If it smells just like grass - another 2-3 days under the lamp.
Sell live tray
Due to the volatile nature of essential oils, cut celery quickly loses its flavor. A live tray in the customer's kitchen — and every cut is fresh.
A closed container during storage is a must
Even at +4°C in an open container, the aroma disappears in 6-8 hours. This distinguishes celery from most greens and is an important detail for quality when sold.
Agronomy notes and common mistakes
- Sowing: No soaking. Very high density. A tiny seed is an even thin layer.
- Clamp: Without clamping.
- Temperature: +18...+22°C. Moderate temperature and high humidity are ideal.
- Watering: 1 time a day. A long cycle requires constant monitoring.
- Ventilation: moderate Avoid drying out the air.
- Throwing out the crop on the 5th day → No sprouts — the grower considers the seeds dead → Celery germinates in 7-9 days. to wait
- Drying out of the substrate → Saw-like seeds die at root hair stage → Moisturize every 2-3 days during blackout
- The temperature is too low → Seeds do not germinate for weeks → Maintain at least +20°C
- Seed thickening (>0.5 g) → Root rot, sticking, mold → Strictly adhere to the norm of 0.2–0.3 g
- Dim lighting in the light → Stems are drawn into threads, the aroma is weak → Phytolamps, 16–18 hours, close to green
- Section at the cotyledon stage → Greens look shapeless, without characteristic leaves → Wait for real carved leaves
- Open storage → The aroma disappears in a few hours → Only a closed container at +2...+5°C
Variety selection
Leaf celery
varieties such as Zakhar, Nizhna
The best choice for microgreens. The seeds are smaller, germinate more evenly, the output of the leaves is more decorative - carved, light, openwork. It is from the sheet that they get the visual result that chefs expect.
Celery stalk
Also suitable, but gives more massive and less openwork leaves. The aroma is usually a little more intense.
Що далі?
More crops in the catalog
Explore similar and contrasting flavors — from basil to amaranth